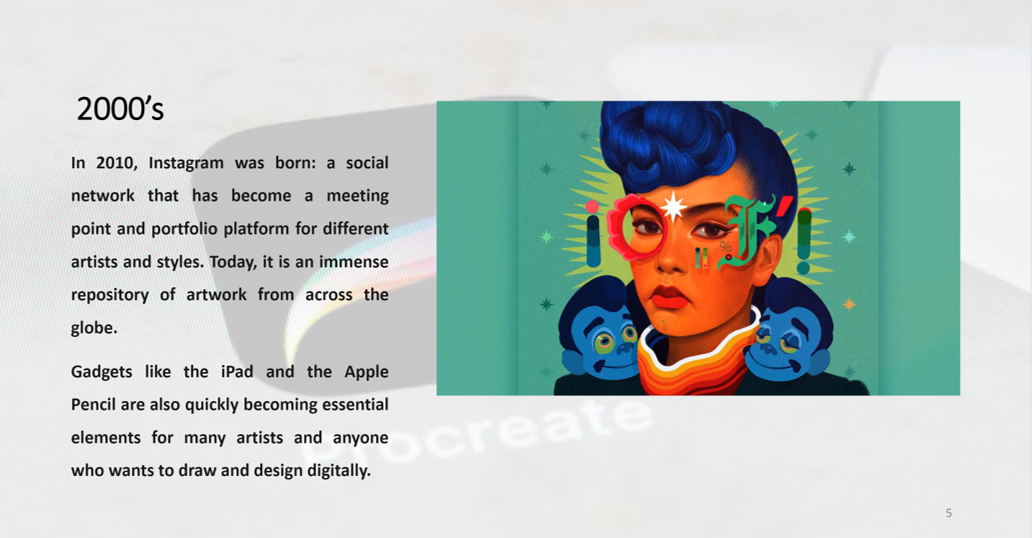
Digital Drawing Series of Desert Landscapes
In this unit the focus will be on nature and how it makes us feel. We will work on translating the sensations into words and words into shapes and symbols creating a two-dimensional illustration. The desert natural elements will be the main theme and we will combine these elements with our reflections to create a unique outcome for every student. Examples of other artists illustrations will be presented with some desert/nature photographs. Saudi Arabia is rich with beautiful scenic desert landscapes and while admiring the source of our inspiration, we will use this knowledge to produce the art intended.
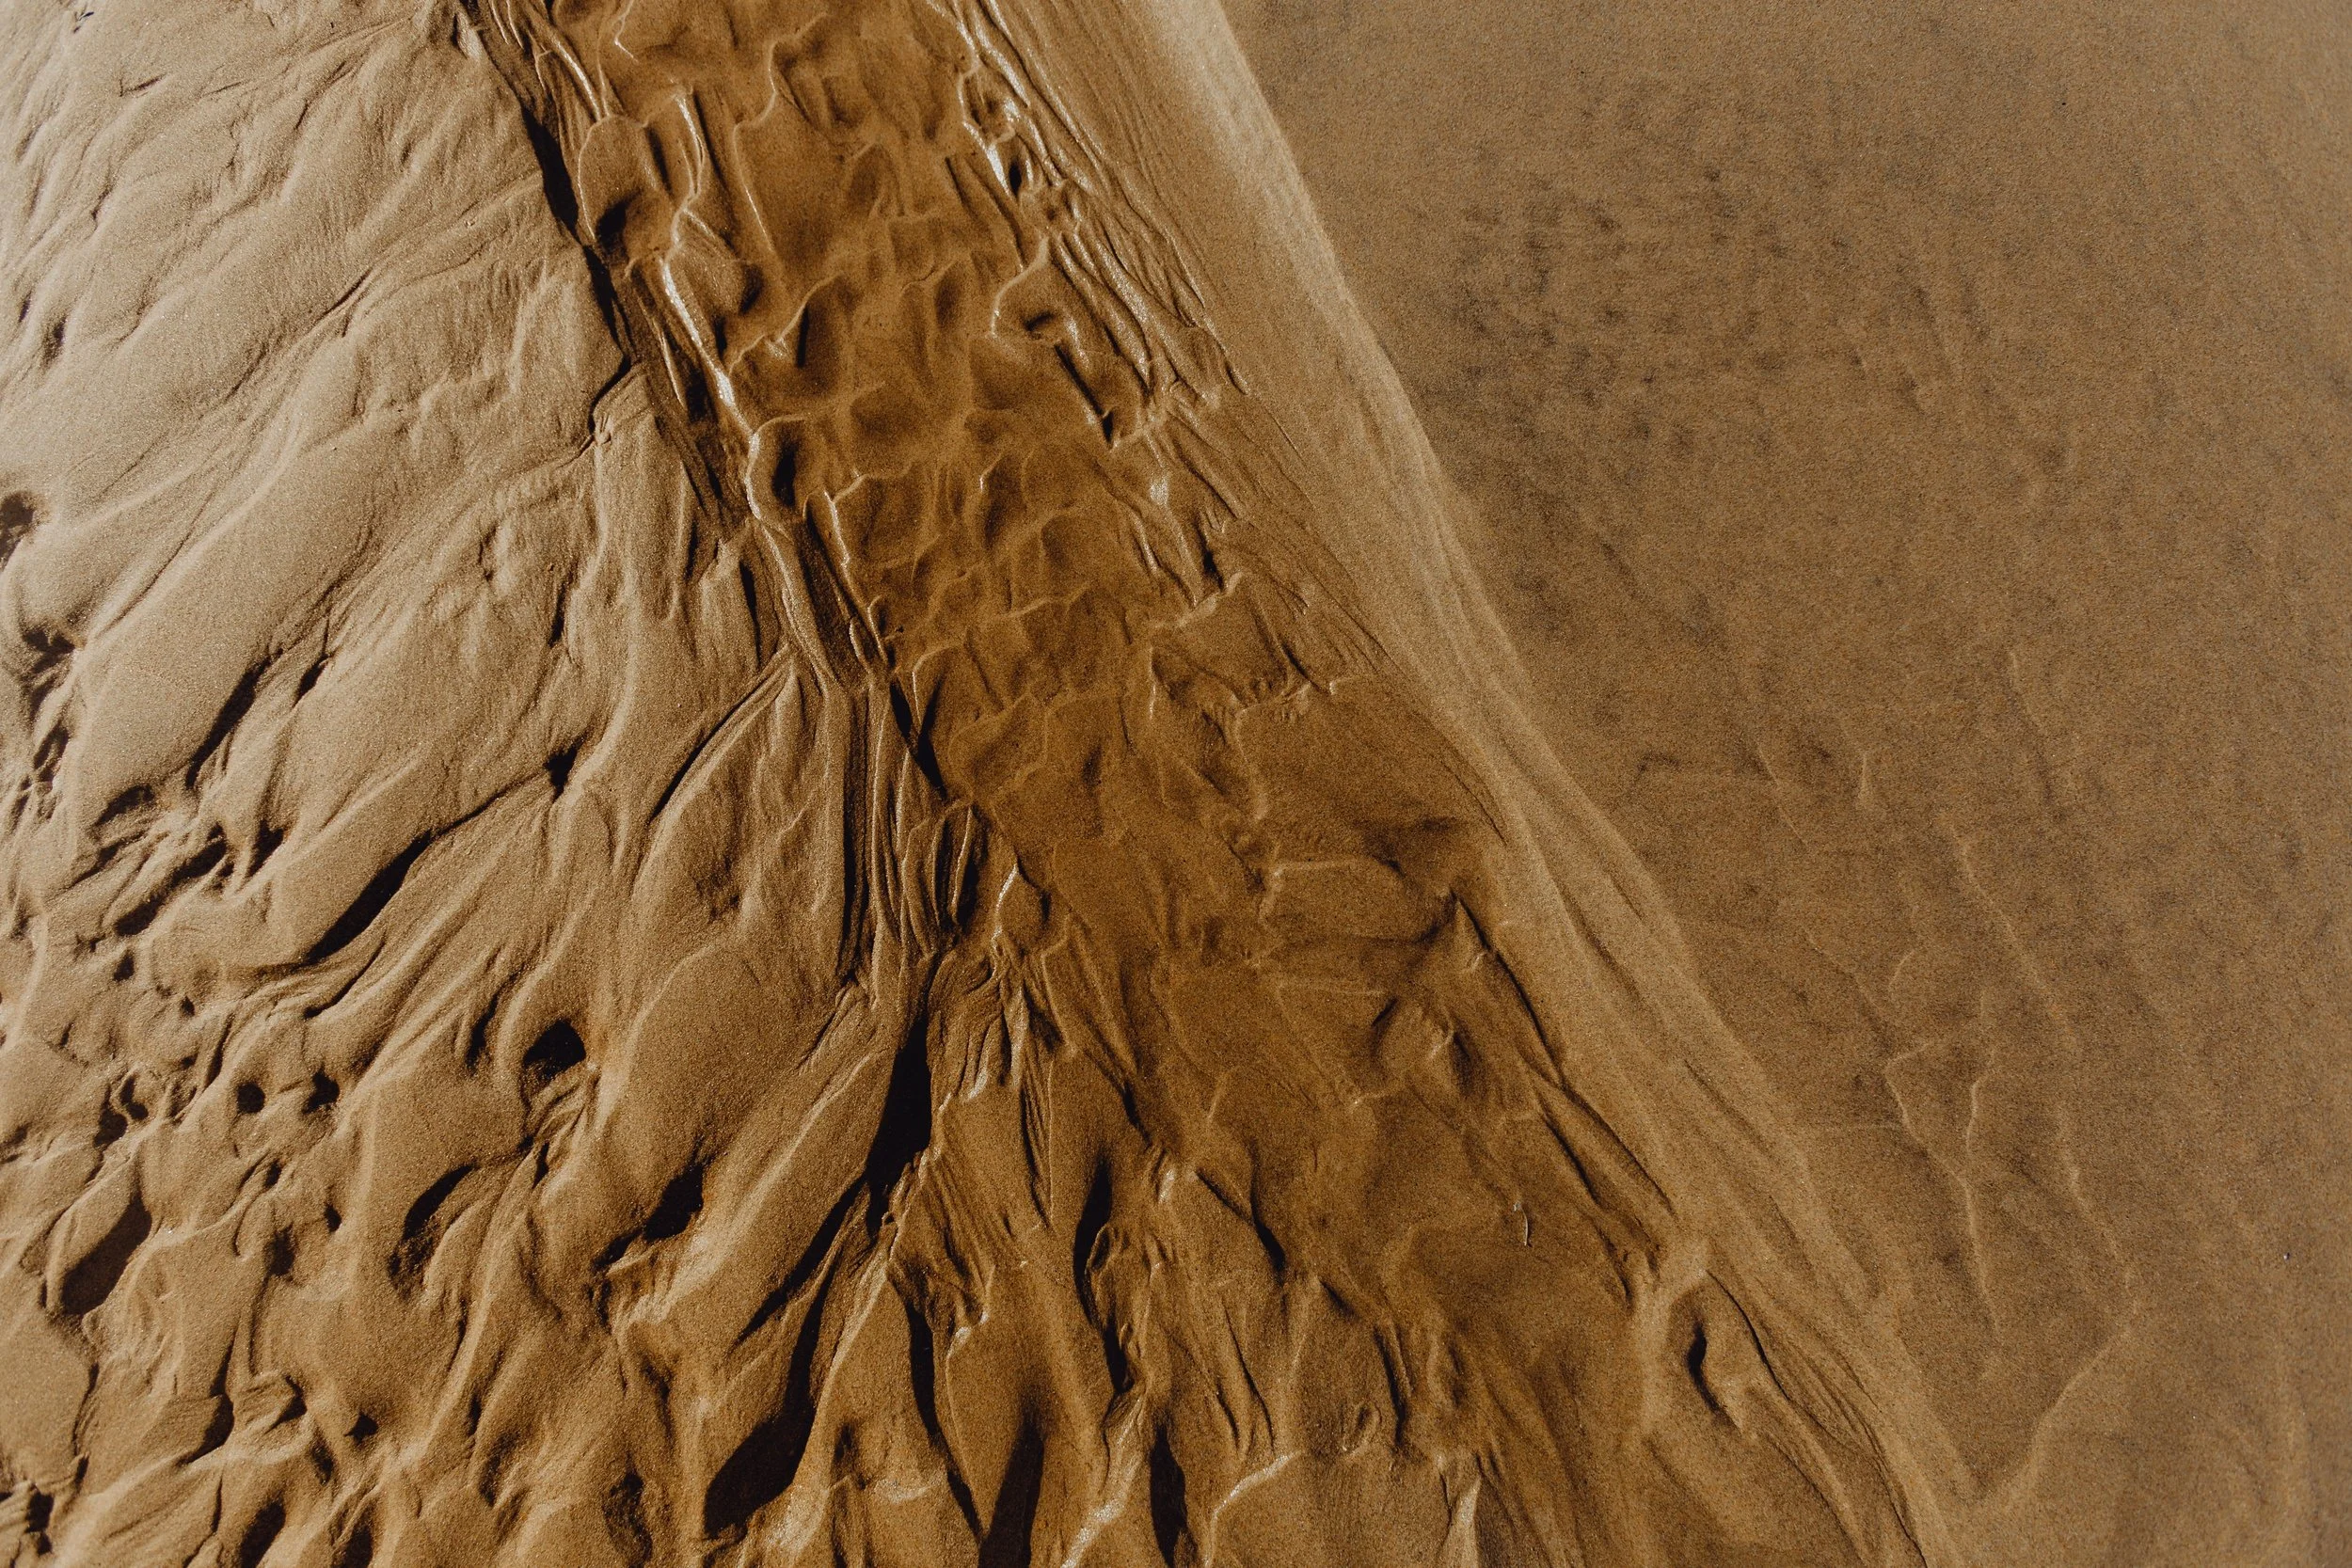
Focus Artwork
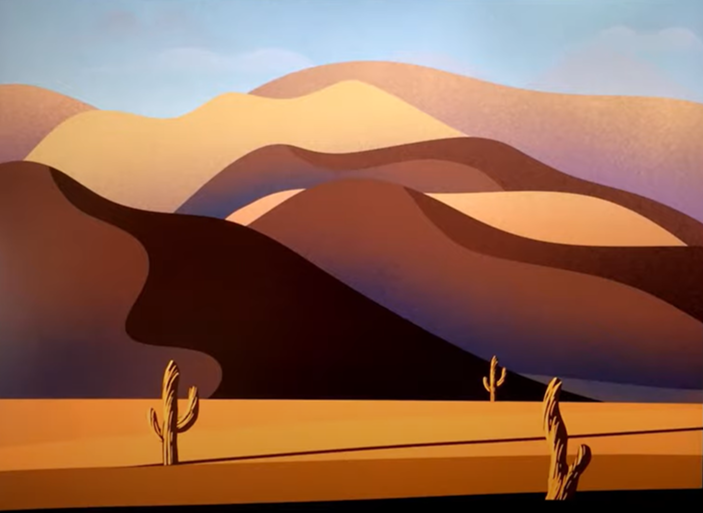
Louis Miiing - Desert Landscape
Our focus artwork uses line to create the different details of the desert sand. It appears to be fading at points in the background and wave-like at the horizon. Line is apparent throughout the dunes to show the motion and movement in the curves and the rolls of the sandy desert, as well as the texture.

Photo by tim & amp; annette FreeImages
Lesson One: History and Culture
-
Grade/Age Level: High School
Time Frame: 1 – 50 minutes class period.
-
In this unit the focus will be on Louis Miiing‘s digital work and the history of digital art. We will start with looking at Miiing’s untitled desert landscape made using Procreate then discuss the history of digital art. This will lead the students towards the main subject of the unit which is desert landscape art.
-
Students will be able to:
• Identify Louis Miiing‘s interest towards digital art and nature illustration.
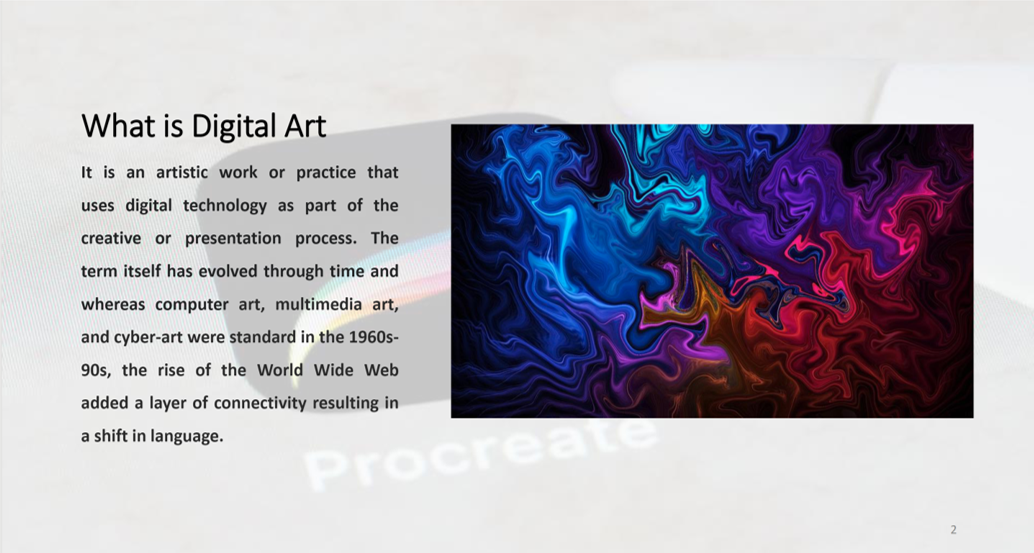
• Describe what qualifies as digital art.
-
• Computer
• Projector
• Slide show: Digital Art
• Article “Digital Art: What Is Digital Art?” Eden Gallery, https://www.eden-gallery.com/news/what-is-digital-art
-
Anticipatory Set:
• Teacher asks the students about their favorite natural setting and then points out the variances between different sceneries and mentions that deserts could be one of them.
• Teacher then prompts her students to use their imaginations and translating their feelings into shapes, textures and colors.
Direct Instruction:
• Review of class plan including the slide show, article reading and the discussion.
• Teacher starts the slide show and discusses the history of digital art.
• Start a brief discussion about digital art. Such discussion prompts could be about the use of shading in Miiing‘s work and how they assimilate to reality, or how he was influenced by nature in most of his artwork.
Guided Practice
• Students read the article about Digital Art: What Is Digital Art Definition?
• Students then are encouraged to engage in an open discussion about history of digital art and how it is incorporated in everything we see now.
Closure (5 minutes)
• A final remark from the teacher combining Miiing‘s art work with Saudi’s deserts reminding them that both are about the same theme.
-
• English Language Learner: Provide the article in their language if needed and/or pair the student with a proficient English reader to help in reading comprehension.
• Student with ADHD: Provide the student with movement breaks and ask them to sit at the front pairing them with a quiet student to follow.
-
• Digital art: is an artistic work or practice that uses digital technology as part of the creative or presentation process.
• Procreate: an application that recreate the natural feel of physical drawing, while utilizing the practical advantages of a digital platform.
-
Did Students:
• Recognize digital artworks and their diversity?
• Value landscape artworks and light and shadow effects?
-
Teacher checks for understanding of the connection between presented information on digital art and the focus artwork. Discussions will be the main method of assessment as the teacher will make sure every student is engaged and aware of the flow of the conversation. The article reading will reinforce the application of different medias and forms of art-making ideas to the desert landscape and will enhance the discussion in class.


Digitally produced desert landscape
Lesson Two: Visual Literacy
-
Grade/Age Level: High School
Time Frame: 1 – 50 minutes class
-
Students will explore the importance of Line as an art element by analyzing types of lines used in various works of art to help them engage with how artists use line to convey movement and mood. They will be introduced to different artworks applying lines in several ways. That will help them at the art making stage. They will learn that line is vital when making, looking at or analyzing works of art. The students will watch a video and read an article about Lines and engage in a fun Kahoot.
-
Students will be able to:
• Identify the use of line in several mediums.
• Analyze a work of art using line as an element of art.
• Explain how line can affect an artwork and its mood.
-
Instructional
• Khan Academy article. https://www.khanacademy.org/humanities/ap-art-history/start-here-apah/elements-of-art-apah/a/line
• Youtube video link https://www.youtube.com/watch?v=BDePyEFT1gQ
• Kahoot
• Computer
• Projector
-
Anticipatory Set
• Teacher asks students to recall information about the element of art of line, from previous instruction and share that with the rest of the class.
• Teacher explains that that they will be deciding on how the lines will be in their desert landscape drawing so they are going to continue learning about line by exploring line types in artworks.
• Teacher will explore how to turn emotions and feelings into lines, shapes and textures.
Direct Instruction
• Teacher provides students with instructions: Read about line as an art element from the Khan Academy article. If help is needed, ask the teacher.
• A discussion is started by the teacher and the prompt questions are about the following:
What defies as contour line and how to distinguish them.
Shading lines and how it gives three-dimensionality to flat drawings.
How lines can indicate movement.
• After everyone is finished reading, the teacher starts the video on the screen but first explains what they will be viewing which a simple explanation of line as an element of art.
Direct Instruction
• A discussion starts with the teacher’s following prompts:
How lines can be in different thicknesses or directions.
Lines can be all manners of qualities.
That line is used to explain and interpret art.
• The students then will start the line Kahoot with the teacher.
Guided Practice
• Class play the Kahoot until the end of the class period.
Closure
• Teacher summarizes line as an element of design and their importance and reminds students that they will choose their own line quality for the desert landscape drawing that they will be creating.
-
• English Language Learner students: Students will be paired with a good reader to help them with the article.
• Students with ADHD: They can be seated at the first row so the teacher makes sure they are reading the article and paying attention to the video.
-
• Contour lines: lines that define shapes
• Shading: the shadows caused when light hits one side of an object, leaving the other in shadow.
-
Did Students:
• Identify different line shapes and qualities used in artwork?
• Explain the effects that different line qualities have on artwork?
• Apply the knowledge they learned in a productive class discussions?
-
Teacher checks for understanding by asking students to respond to questions regarding line qualities during class discussions. Teacher will clarify information, when needed. Kahoot will be a fun method to gauge student’s understanding.
Lines in the desert
Lesson Three: Skill Building
-
Grade/Age Level: High School
Time Frame: 2 – 50 minutes class
-
Students will practice working on Procreate and will be introduced to the basic features of the application. These skills are necessary to be able to create their own desert landscape drawing using digital media. They will be familiarized with the basic interface of the program and tools through a practice exercise drawing lines and basic shapes using the iPencil. They will learn how to manipulate the tools in order to get the sought out results. The teacher will take them through the process of using the application step by step.
-
Students will be able to:
• Identify basic Procreate interface features.
• Create a line sheet on Procreate.
• Apply line in their work and know how quality of line can affect the results.
-
• iPad
• iPencil
• Procreate application downloaded and ready to use.
Instructional resources:
• Projector
• iPad
• iPencil
• Worksheet
-
DAY 1:
Anticipatory Set
• Teacher explains that they will work on Procreate basics, and practice on a worksheet. She reveals that these skills are important to be able to produce the final desert landscape drawing.
• Teacher showcases some Procreate artworks that made it to media.
Direct Instruction
• Teacher starts with Procreate interface basics by showing what different buttons do on the screen connected to her iPad.
• Teacher demonstrates:
o Different line strokes and how to control the iPencil such as side strokes and pressure differences.
o how to control the interface using gestures such as how to zoom, selections, opacity control and such.
o How to manipulate color and changing tolerance and saturation while picking between values, layers and their effect on the overall quality of the drawing and adjustments altering lines while distorting them or applying effects.
• During the demonstration, the teacher will ask students to recall parts of the demonstration and instructions for completing the exercise to check for their understanding.
Guided Practice
• Students will be going through a step-by-step screencast explaining the how-to part of this course.
• Teacher will pause the video when needed to give students time to practice the steps.
• Students will work on a general guide through the application, drawing shapes, lines and adding colors using different brush tools.
Independent Practice
• Students begin working on their worksheet as they will import it as a photo to their Procreate. Teacher walks around the room to answer questions and ensure students are on the right track.
• Students complete their exercises at home – they are due the following day.
Closure
• Teacher goes through the steps they learned and ask students to show their progress on the worksheets.
DAY 2 (10 minutes)
Closure
• Teacher asks students to recap the key things to remember when lines and colors and creating shapes on the app.
• Students turn in their worksheet.
• Teacher showcases the best done worksheets to the class.
-
• English Language Learner: pair with a student who knows their native language during practice time. Provide written instructions for the worksheet so students can use translation software to translate into their native language.
• ProCreate users: Come up with creative solutions to the requested items on the practice sheet using layers or advanced alterations.
-
• Layer: allows you to isolate elements of your drawing for manipulation and effects.
• Selection tool: outlining the section of your sketch that you want to color.
• Opacity: to control how the quality of lacking transparency or translucence your brush stroke and smudge are.
-
Did Students:
• Explain how to apply adjustments and fill with color.
• Apply what they learned on the practice sheet.
• Draw different values of lines on ProCreate.
-
During studio time, as students are working, the teacher will monitor the progress of students to ensure they are working and on track for completing the practice sheet. Teacher will clarify instructions, answer questions, or re-teach, when needed. The exercise will be evaluated based on the amount of completion, according to the instructions.
Skill worksheets
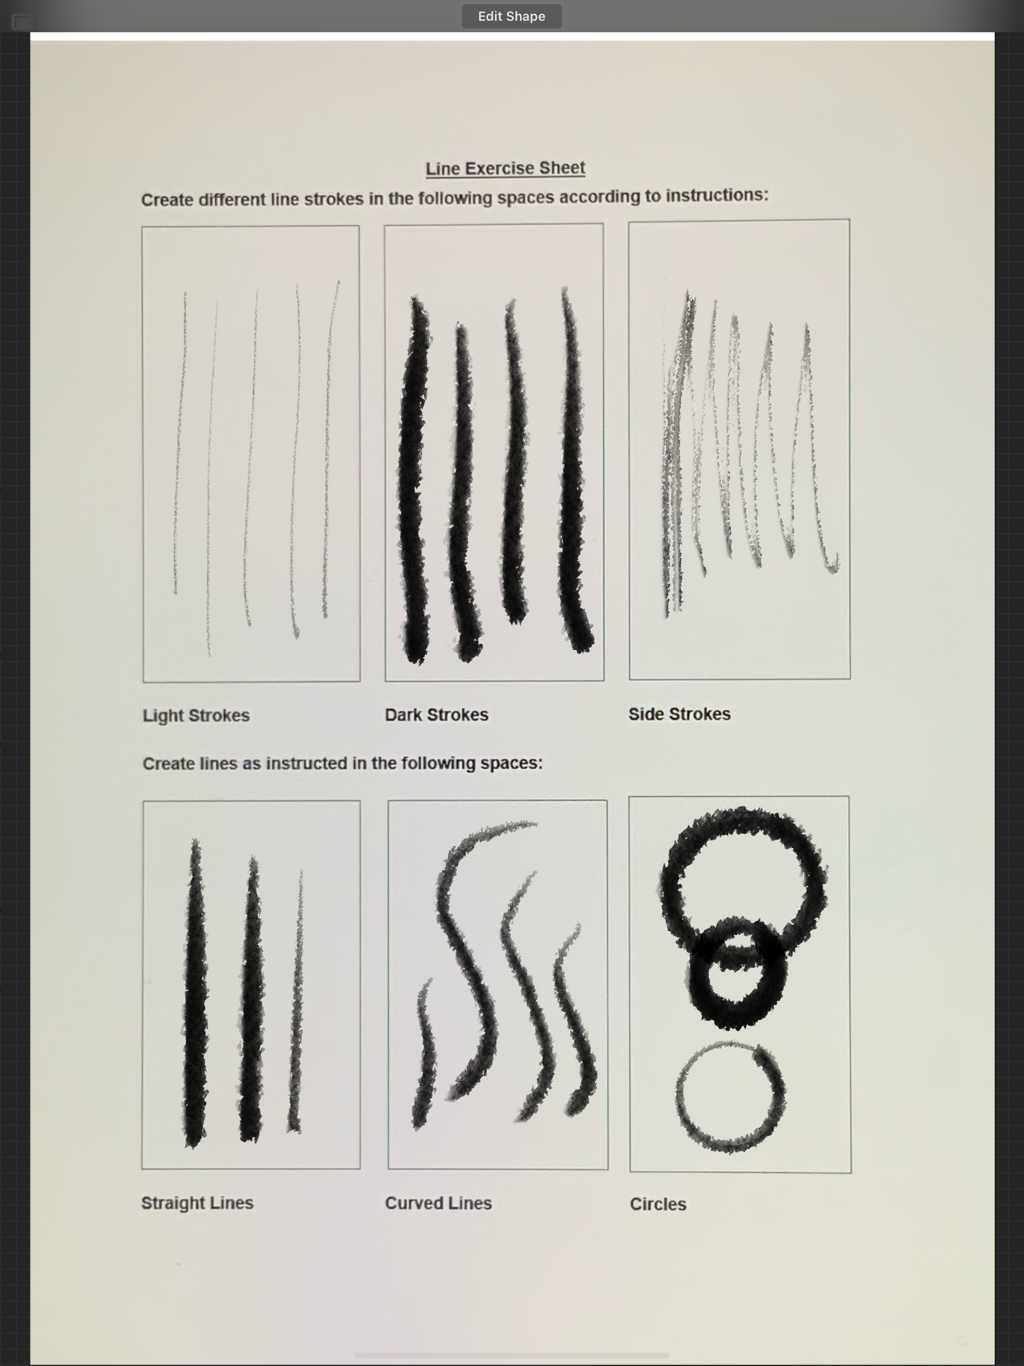
Worksheet One
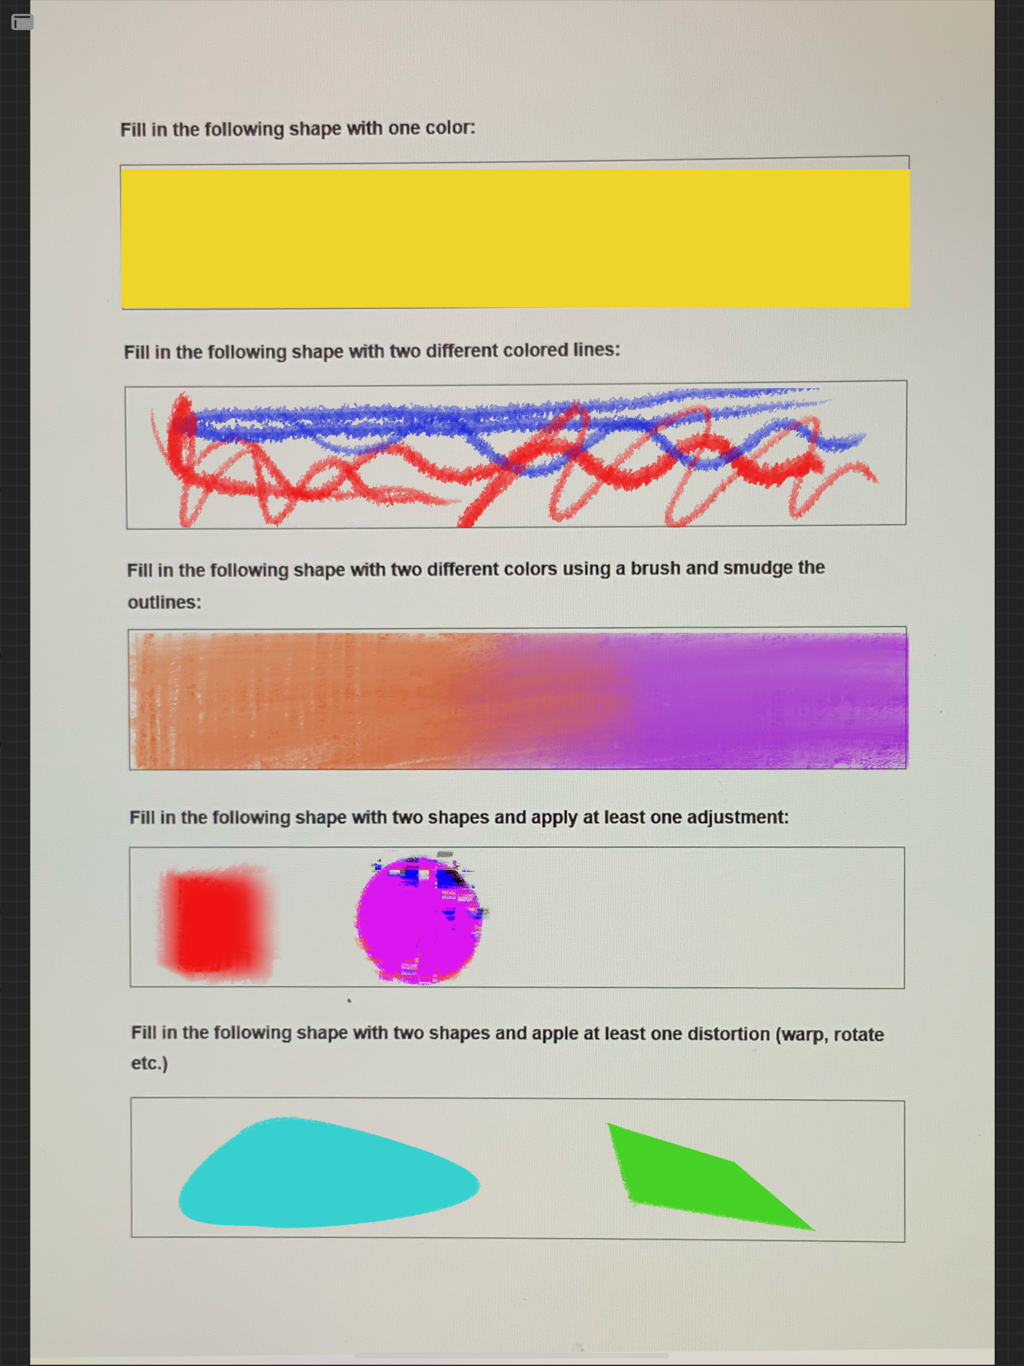
Worksheet Two

iPad and an iPencil
Lesson Four: Art Production
-
Grade/Age Level: High School
Time Frame: 4 – 50 minutes class
-
Students will be able to produce a digital drawing of a desert landscape. They will use the basic skills they learned from the previous class and apply it in this step. The teacher will be able to support them as the work will be done during class time. They will use lines and what they learned from previous lessons on how to manipulate them in order to get the sought out results.
-
Students will be able to:
• Describe their process and rationale for getting inspiration from Saudi desert landscape and transforming that in their artwork.
• Apply what they learned from previous lessons, especially line and its qualities.
• Produce a landscape series drawings using digital media.
• Communicate their feelings about the desert landscape through the production of an original artwork.
-
• iPad
• iPencil
• Procreate application downloaded and ready to use.
Instructional resources:
• Projector
• iPad
• iPencil
• Saudi landscape images for inspiration
-
DAY 1
Anticipatory Set
• Teacher asks students to share their feelings about a natural landscape specifically the desert as they will be able to find inspiration through images of deserts and historical sites in the Kingdom.
• Prompts can include the following:
What do you feel when you see a beautiful natural scenery?
Close your eyes and focus on these feelings. What shapes do you see? What colors pop into your mind?
Now look at Saudi desert images and describe how they make you feel and what colors, shapes and lines pop up in your head? Write them down.
• Teacher discusses how the feelings they had can be translated in textures, colors and shapes.
Direct Instruction
• Teacher states that the goal for the artwork will be to draw a series of desert landscapes to visually communicate the impressions they have over nature using the colors and line’s shapes they wrote down in the previous step as well as adding symbols or elements to the drawings.
• Teacher shows digital artwork for landscapes created by Louis Miiing and asks students what they think the artist wanted to represent.
• Teacher focuses on aspects of the American desert portrayed in his work like the cacti.
• Teacher shows student artwork examples and asks students about the how the artists used shapes and line textures in them as well as symbols or elements that made them unique.
• Teacher explains that they need to look at Saudi desert landscape images for inspiration and start listing how to communicate those feelings into line textures, colors and shapes as well as symbols or unique features.
• Teacher explains the second step which is rough sketching in order to get to a desired landscape structure.
• Students choose one image from the previous step and then create four rough sketches that represent the Saudi landscape. Emphasize the importance of deciding on the lines to draw and how they should be depicted and arranged.
Independent Practice
• Students begin the process as the teacher walks around the room to answer questions and ensure students are on the right track.
• Students who complete their rough sketches before the end of class should ask a peer to review their rough sketches for feedback, and then draw more.
• Students complete their sketches at home - they are due the following day.
DAY 2
Anticipatory Set
• Students, in groups of 4-5, discuss each other’s rough sketches. They should evaluate them based on communicated feeling through texture and line quality. (closure for rough sketching)
Direct Instruction
• Teacher explains the third step of the project: artmaking. Students create a drawing series that is inspired by Saudi desert landscape. The rubric is reviewed and discussed to identify the expectations for the artwork.
• Teacher explains the first part of completing the artwork – painting the background and starting to structure the sand dunes.
Independent Practice
• Students begin the artwork by choosing their color palette and starting to apply it in the background and start building their dunes in layers. Teacher walks around the room to answer questions and ensure students are on the right track.
Direct Instruction
• Teacher explains the second part of completing the artwork which is adding layers of color to the drawings, using the techniques learned in the skill building lesson.
• Teacher asks students to recall the layer adjustments learned and smudging, which was taught in a previous lesson.
Guided Practice
• Students continue their artworks by adding layers to the drawing. If they have not had their drawings checked by the teacher, they should do so before continuing. Teacher walks around the room to answer questions and ensure students are on the right track.
Independent Practice
• Students who do not complete their background and layering steps in class should do so at home - they are due the following day.
DAY 3
Independent Practice
• Students continue their artworks by adding more layers and effects on the drawing. Teacher walks around the room to answer questions and ensure students are on the right track.
• Students, in groups of 4-5, analyze each other’s drawings to offer last minute advice for improvement.
• Students start finalizing their drawings and submitting them to the teacher via the school cloud.
DAY 4
Closure
• Students assess their artworks by marking the criteria that they met on the rubric as well as write a brief explanation to why they scored themselves in this manner.
-
• English Language Learner: Flip the language in the iPad to be in the student’s native language. Ask a student who knows their native language to help during application time.
• Procreate users: Come up with creative solutions to the desert landscape project adding layers or advanced alterations and shadows.
-
• Illustration: is the technique of using a computer to produce original artwork.
• Gallery view: to view your Procreate drawings within the app.
• Timelapse: a video records every step of the creation of your image.
-
Did Students:
• Describe their process and idea for their desert landscape
• Apply the techniques of line and color fill in the shapes.
• Communicate a feeling through the production of an original artwork.
-
During studio time, as students are working, the teacher will monitor the progress of students to ensure they are working and on track for completing the project and meeting the objectives. Teacher will clarify instructions, answer questions, re-teach, or modify lessons, when needed. Students will earn participation points for staying on-task during studio time and engaging in the small group reviews and analysis. The brainstorms and rough sketches will be evaluated based on their completion, according to the instructions, and the artwork will be evaluated according to the rubric.
-
• Students make sure they have kept their pencils and sketchbooks put away in their designated areas before leaving the classroom.
• iPads should have their own cover and screen padding for protection.
• iPencils to be put away at the side of the iPad for protection.
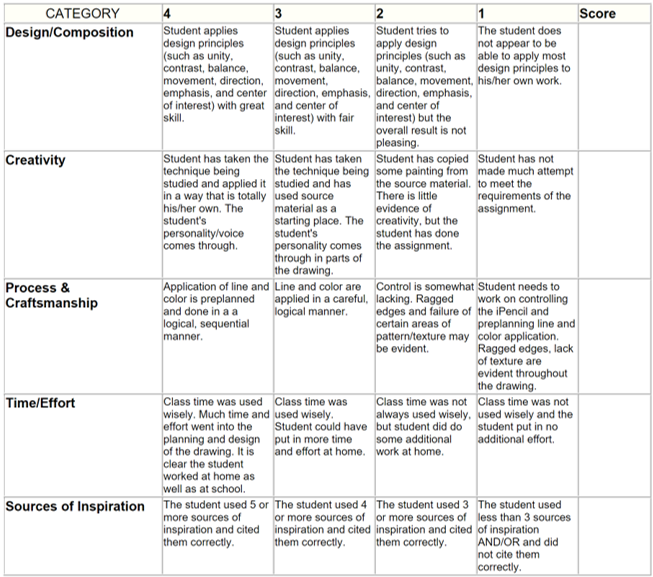
Rubric
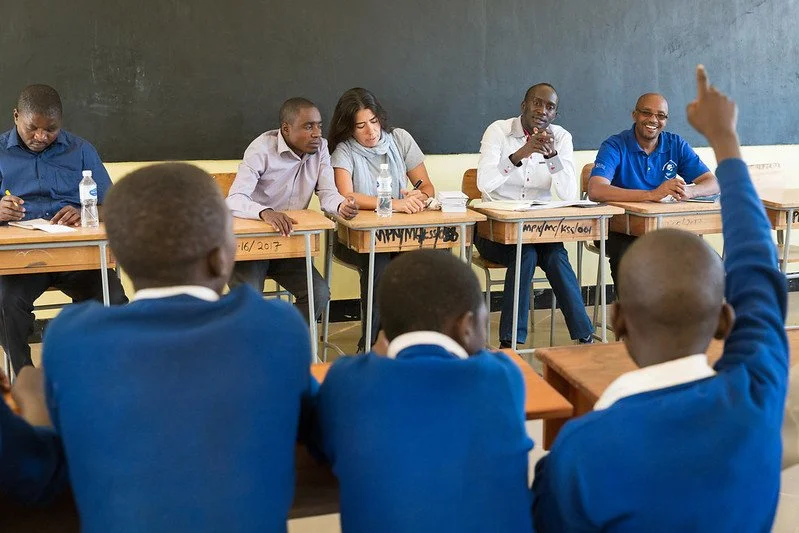
A class critique
Lesson Five: Art Criticism
-
Grade/Age Level: High School
Time Frame: 2 – 50 minutes class
-
Students will present their digital drawing of a desert landscape to the class after they are introduced to the four steps of the Feldman Model which is a process for critiquing artwork. The model includes the following steps: description, analysis, interpretation, and evaluation and summarize, in writing in a worksheet, what they will say as they present their work.
-
Students will be able to:
• Identify and describe the four steps of the Feldman Model—description, analysis, interpretation, and evaluation
• Describe and analyze an artwork in order to determine its meaning and success.
• Present an oral critique of their artwork.
-
• Worksheet
Instructional resources:
• Projector
• Computer
• Various of Louis Miiing’s work
• The Visual Experience (pages 20-27)
• Art criticism worksheet
• Critique rubric
-
DAY 1
Anticipatory Set
• Teacher ask the students to recall a time when they evaluated a videogame or watched a YouTube video assessing a new game and the criteria for which it is usually judged.
• Teacher states that art is no different; in art people evaluate artwork based on their personal criteria for successful artwork.
Direct Instruction
• Teacher discusses the Feldman Model and its steps which is used to evaluate or critique an artwork.
• Teacher explains that they will use the Feldman Model to write a critique for their landscape digital drawing. Lastly, they will use their written critique as they present their drawings to the class.
• Teacher states that students will, today, work in groups to learn about the Feldman Model.
• Teacher announces the groups (four to five students per group) and asks that each student gather a writing utensil.
• Students gather their materials and form their groups; teacher distributes an image of an artwork (an artwork created by Louis Miiing) to each group.
• Teacher asks students to turn to page 20 (2.3 A Critical Method) in The Visual Experience.
• Teacher explains that they will, as a group, review each step by reading about the step and applying it to the artwork they received.
Guided Practice
• Students read about the Feldman model and apply it to the artwork they received.
• The teacher circulates the room and provides assistance.
• The teacher also listens as students critique the artwork to ensure they are doing each step correctly.
• As groups finish the activity, the teacher explains that they will now use the Feldman Model to critique their landscape drawing; as they do they should write their criticism on the art criticism worksheet so they may refer to it as they present their drawings to the class. Teacher also describes the criteria for their oral critiques.
• Students work on their individual critiques until the end of the class. Teacher walks around the room to answer questions and ensure students are on the right track.
Independent Practice
• Students who do not finish their art criticism do so as homework. - they are due the following day.
DAY 2
Direct Instruction
• Teacher asks students to recall and describe the four steps of the Feldman Model.
• Teacher asks students to recall things that are important to remember when giving an oral presentation and reminds them of the criteria for their critiques.
• Teacher explains that they will begin taking turns presenting their critiques to the class.
Guided Practice
• Students take turns presenting their critiques to the class.
Closure
• Teacher and students participate in a conversation about the benefits of art criticism—how it can benefit artists and viewers of art.
-
• English Language Learner: Placed in a group with another student who knows his/her native language and English and/or presented with a version of the Feldman Model that is translated into his/her native language.
• Students with ADHD: Pair them with focused students and see to have them in 2-3 students groups maximum. Seat them at the front table to be able to explain what is needed again.
-
• Critique: an oral or written discussion strategy used to analyze, describe, and interpret works of art.
• Criteria: a principle or standard by which something may be judged or decided.
-
Did Students:
• Describe and identify an artwork in order to determine its meaning and success?
• Present an oral critique of their artwork?
-
Teacher checks for understanding by monitoring the progress of students as they are working with their groups to ensure they are accurately critiquing the artwork that they received. Teacher will clarify information, when needed. The worksheet will be evaluated based on completion. The oral critiques will be evaluated according to the rubric.
-
Art Criticism Name _____________________
Description_____________________________________________________________________________________________________________________________________________________________________________________________________________________________________________________________________________________________________________________________________________________________________________________________________________________________________________________________________
Analysis_______________________________________________________________________________________________________________________________________________________________________________________________________________________________________________________________________________________________________________________________________________________________________________________________________________________________________________________________________
Interpretation____________________________________________________________________________________________________________________________________________________________________________________________________________________________________________________________________________________________________________________________________________________________________________________________________________________________________________________________________
Judgment______________________________________________________________________________________________________________________________________________________________________________________________________________________________________________________________________________________________________________________________________________________________________________________________________________________________________________________________________
